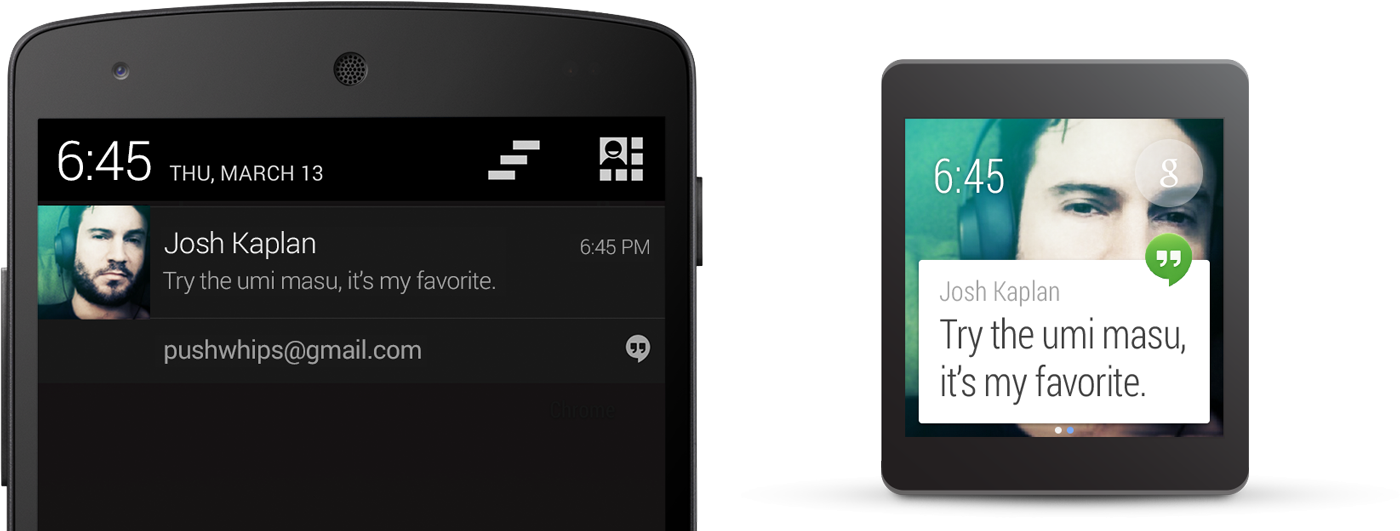
When an Android device such as a phone or tablet is connected to an Android wearable,
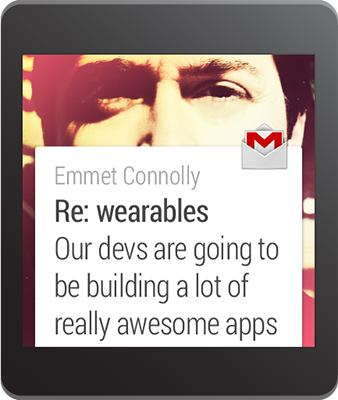
all notifications are shared between the devices by default. On the Android wearable, each
notification appears as a new card in the context stream.

So without any effort, your app notifications are available to users on Android Wear.
However, you can enhance the user experience in several ways. For instance,
if users may respond to a notification by entering text, such as to reply to
a message, you can add the ability for users to reply by voice directly from the
wearable.
To help you provide the best user experience
for your notifications on Android Wear, this guide shows you how to
build notifications using standard templates in
the NotificationCompat.Builder APIs, plus how to begin
extending your notification's capabilities for the wearable user experience.
Note:
Notifications using RemoteViews are stripped of custom
layouts and the system uses only the text and icons in the
Notification object to
display the notification in a card. However, custom card layouts will be supported by
the official Android Wear SDK that is coming later.
Import the Necessary Classes
To begin development, you must first complete the instructions in the Get Started with the Developer Preview document.
As mentioned in that document, your app must include
both the v4 support
library and the Developer Preview support library. So to get started,
you should include the following imports in your project code:
import android.support.wearable.notifications.*;
import android.support.wearable.app.NotificationManagerCompat;
import android.support.v4.app.NotificationCompat;
Caution:
The APIs in the current Android Wear Developer Preview are intended for development and testing purposes only, not for production apps. Google may change this Developer Preview significantly prior to the official release of the Android Wear SDK. You may not publicly distribute or ship any application using this Developer Preview, as this Developer Preview will no longer be supported after the official SDK is released (which will cause applications based only on the Developer Preview to break).
Create Notifications with the Notification Builder
The v4
support library allows you to create notifications using the latest notification features
such as action buttons and large icons, while remaining compatible with Android 1.6 (API level
4) and higher.
For example, here's some code that creates and issues a notification using the
NotificationCompat APIs combined with the new
NotificationManagerCompat API:
int notificationId = 001;
// Build intent for notification content
Intent viewIntent = new Intent(this, ViewEventActivity.class);
viewIntent.putExtra(EXTRA_EVENT_ID, eventId);
PendingIntent viewPendingIntent =
        PendingIntent.getActivity(this, 0, viewIntent, 0);

NotificationCompat.Builder notificationBuilder =
        new NotificationCompat.Builder(this)
        .setSmallIcon(R.drawable.ic_event)
        .setContentTitle(eventTitle)
        .setContentText(eventLocation)
        .setContentIntent(viewPendingIntent);

// Get an instance of the NotificationManager service
NotificationManagerCompat notificationManager =
        NotificationManagerCompat.from(this);

// Build the notification and issues it with notification manager.
notificationManager.notify(notificationId, notificationBuilder.build());
When this notification appears on a handheld device, the user can invoke the
PendingIntent
specified by the setContentIntent() method by touching the notification. When this
notification appears on an Android wearable, the user can swipe the notification to the left to
reveal the Open action, which invokes the intent on the handheld device.

In addition to the primary content action defined by
setContentIntent(), you can add other actions by passing a PendingIntent to
the addAction() method.
For example, the following code shows the same type of notification from above, but adds an
action to view the event location on a map.
// Build an intent for an action to view a map
Intent mapIntent = new Intent(Intent.ACTION_VIEW);
Uri geoUri = Uri.parse("geo:0,0?q=" + Uri.encode(location));
mapIntent.setData(geoUri);
PendingIntent mapPendingIntent =
        PendingIntent.getActivity(this, 0, mapIntent, 0);

NotificationCompat.Builder notificationBuilder =
        new NotificationCompat.Builder(this)
        .setSmallIcon(R.drawable.ic_event)
        .setContentTitle(eventTitle)
        .setContentText(eventLocation)
        .setContentIntent(viewPendingIntent)
        .addAction(R.drawable.ic_map,
                getString(R.string.map), mapPendingIntent);
On a handheld device, the action appears as an
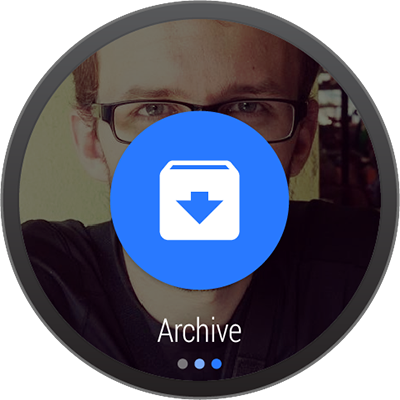
additional button attached to the notification. On an Android wearable, the action appears as
a large button when the user swipes the notification to the left. When the user taps the action,
the associated Intent is invoked on the handheld device.
Tip: If your notifications includes a "Reply" action
(such as for a messaging app), you can enhance the behavior by enabling
voice input replies directly from the Android wearable. For more information, read
Receiving Voice Input from a Notification.
For details about designing action buttons (including the icon specifications), see the
Design Principles of Android
Wear.
Add a Big View

You can insert extended text content
to your notification by adding one of the "big view" styles to your notification. On a
handheld device, users can see the big view content by expanding the notification,
while on Android Wear, the big view content is visible by default.
To add the extended content to your notification, call setStyle() on the NotificationCompat.Builder object, passing it an instance of either
BigTextStyle or
InboxStyle.
For example, the following code adds an instance of
NotificationCompat.BigTextStyle to the event notification,
in order to include the complete event description (which includes more text than can fit
into the space provided for setContentText()).
// Specify the 'big view' content to display the long
// event description that may not fit the normal content text.
BigTextStyle bigStyle = new NotificationCompat.BigTextStyle();
bigStyle.bigText(eventDescription);

NotificationCompat.Builder notificationBuilder =
        new NotificationCompat.Builder(this)
        .setSmallIcon(R.drawable.ic_event)
        .setLargeIcon(BitmapFractory.decodeResource(
                getResources(), R.drawable.notif_background))
        .setContentTitle(eventTitle)
        .setContentText(eventLocation)
        .setContentIntent(viewPendingIntent)
        .addAction(R.drawable.ic_map,
                getString(R.string.map), mapPendingIntent)
        .setStyle(bigStyle);
Notice that you can add a large background image to any notification using the
setLargeIcon()
method. For more information about designing notifications with large images, see the
Design Principles of Android
Wear.
Add New Features for Wearables
The Android Wear preview support library provides new APIs that
allow you to enhance the user experience for notifications on a wearable device. For example,
you can add additional pages of content that users can view by swiping to the left, or add the ability
for users to deliver your app a text response using voice input.
To use these new APIs:
- Create an instance of
NotificationCompat.Builder, setting the
desired properties for your notification.
- Create a
WearableNotificationOptions.Builder, setting the wearable-specific options for the notication.
- Call
WearableNotificationOptions.Builder.applyTo()
, passing in the NotificationCompat.Builder. This applies
the wearable options to the notification.
For example, the following code calls the
setHintHideIcon() method to remove the app icon from the notification card.
// Create a NotificationCompat.Builder for standard notification features
 NotificationCompat.Builder builder = new NotificationCompat.Builder(mContext)
         .setContentTitle("New mail from " + sender)
         .setContentText(subject)
         .setSmallIcon(R.drawable.new_mail);
// Create a WearablesNotificationOptions.Builder to add functionality for wearables
 Notification notif = new WearableNotificationOptions.Builder()
         .setHintHideIcon(true)
         .build()
         .applyTo(builder); //apply wearable options to to the original notification
         .build()
The
setHintHideIcon() method is just one example of new notification features available with the
WearableNotificationOptions.Builder class.
When you want to deliver your notifications, always use the
NotificationManagerCompat API instead of
NotificationManager:
// Get an instance of the NotificationManager service
NotificationManagerCompat notificationManager =
        NotificationManagerCompat.from(this);

// Issue the notification with notification manager.
notificationManager.notify(notificationId, notif);
If you use the framework's NotificationManager, some
features from WearableNotificationOptions.Builder
do not work.
To continue enhancing your notifications for wearables using
WearableNotificationOptions.Builder and other APIs in the
preview support library, see the following developer guides:
- Receiving Voice Input
from a Notification
- Add an action that receives voice input from the user and delivers the
transcribed message to your app.
- Adding Pages to a Notification
- Add additional pages of information that are visible when the user
swipes to the left.
- Stacking Notifications
- Place all similar notifications from your app in a stack, allowing each to be
viewed individually without adding multiple cards to the card stream.


